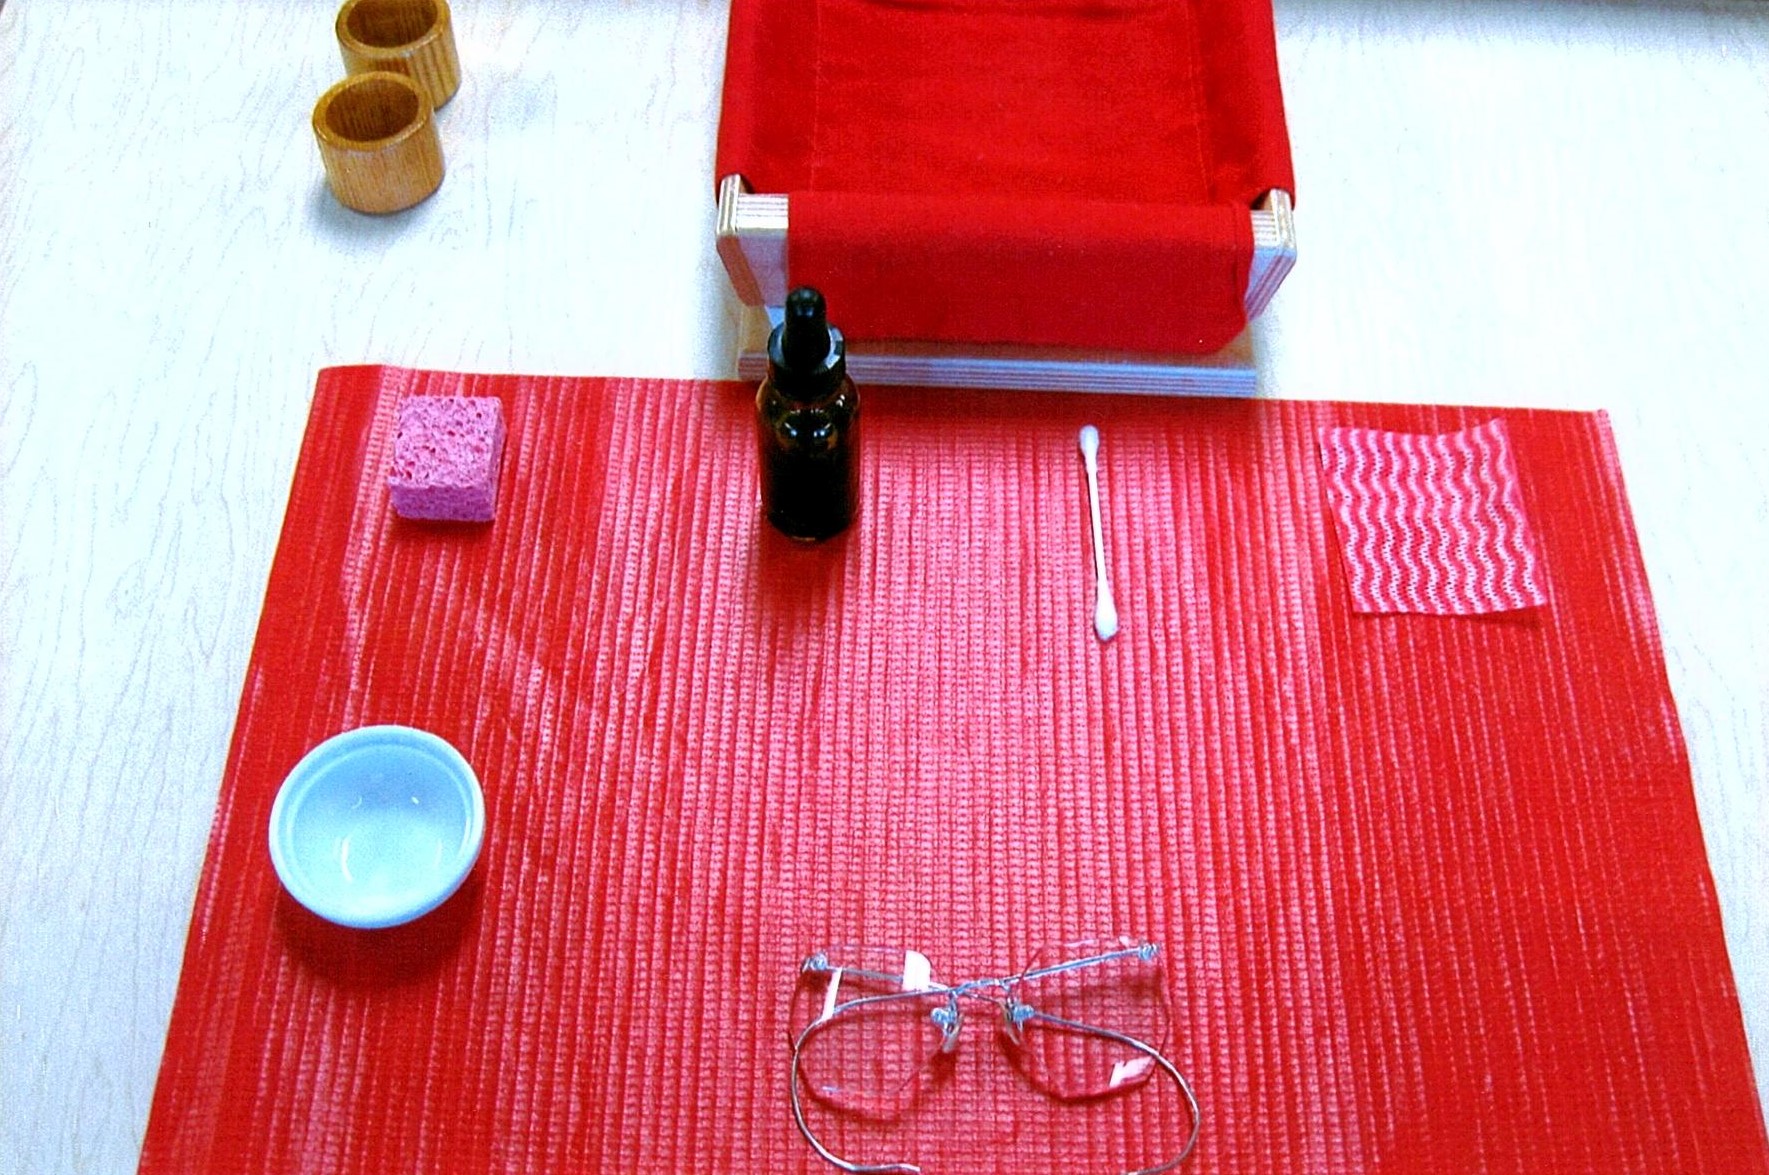
A place mat, an apron, and a basket containing polish, small cloth, sponge, small dish, Q-Tip, and mirror.
Presentation
Show child where the materials are located.
Put on apron. Obtain placemat. Put placemat on table.
Obtain basket and carry it to the table with the placemat.
Sit appropriately at the table.
Remove mirror. Place in center of placemat.
Remove polish dish. Place on left side of mat.
Remove sponge. Place in left upper corner of mat.
Remove polish. Place to the right of the sponge.
Remove Q-Tip. Place to the right of the polish.
Remove cloth for polishing. Place to the right of the Q-Tip.
Lift polish container with subdominant hand. Open polish with dominant hand.
Place a small amount of polish in the center of the polish dish. (My polish container has a dropper.)
Wipe polish container as needed with sponge to clean. Close polish.
With subdominant hand, hold the mirror.
Grasp the Q-Tip with dominant hand. Dip Q-Tip into the polish.
Apply polish to the mirror in a circular motion.
Continue to dip and apply.
When mirror is covered, place Q-Tip in polish dish.
Watch the surface of the mirror change when it dries and notice the smell of the polish.
Pick up the polish cloth.
Rub off in a circular motion.
Stand and push in the chair.
Place Q-Tip in garbage can. Return to table and sit.
Clean out polish dish with polish cloth.
Place dish and polish cloth into the basket.
Wipe mat, left to right, top to bottom, with sponge and then place sponge into the basket.
Return placemat to shelf. Return basket to shelf.
Place soiled polish cloth in laundry basket if necessary.
Choose a clean polish cloth and a clean Q-tip and place them in the basket.
Take off apron and hang.
Wash hands.
Points of Interest:
Appearance of materials, color, and texture, repeating the activity as long as needed, smelling the polish, seeing the difference between the polished and unpolished areas, seeing and feeling the polish applied in a circular motion, watching the polish dry, replacing polish cloth and Q-Tip.
Control of Error:
Seeing polish left on the mirror, seeing large amount of polish left in the dish, seeing polish on the mat, polishing dish is small and holds a limited amount of polish.
Polishing glass, silver, brass, copper, wood, or leather, using a small sponge instead of a Q-Tip, polishing more involved pieces (my students LOVE polishing a menorah), or polishing furniture.
Extensions:
polishing glasses
Eye glass polishing, shoe polishing, leaf polishing, window washing, or washing the outside glass of an aquarium.
Comments:
Polish for Glass- 1part vinegar, 6 parts water
Polish for Wood - 3 parts lemon juice, 1 part olive or flaxseed oil (shake well)
Polish for Silver- Toothpaste with baking soda base or mix baking soda with water to form a paste
Polish for Brass or Copper - 2 tablespoons of salt, 1 tablespoon of lemon juice, 1 tablespoon of vinegar (Combine the ingredients, adding enough vinegar and lemon juice to produce a thick paste. Rub on with a Q-Tip. Rinse with water and polish with a clean, soft cloth.)
Polish for Leather - 1 tablespoon of beeswax, 1/2 cup of flaxseed oil (Combine ingredients in a small pan and heat slowly until the beeswax has melted. Pour the mixture into a heat resistant container to let cool. Once the polish has solidified, it will be like thin Vaseline.)